How to Recharge Your Car A/C in 15 Minutes
Cost
Skill Level
Start to Finish
½ Day

|
|
|
|

Introduction
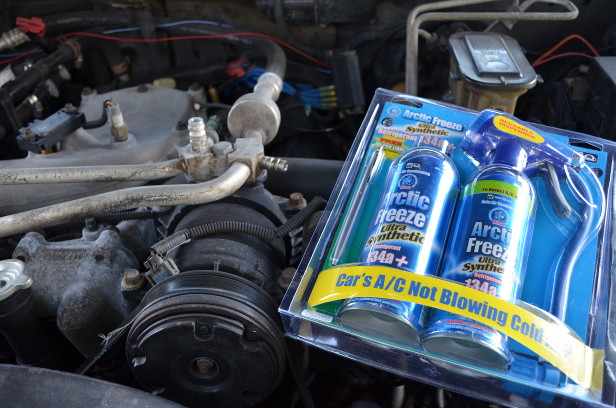
First, purchase a charge kit for your car. Consult your local auto parts store for the appropriate type of refrigerant. The common off-the-shelf refrigerant is R-134 which became mandatory in the 1995 model year as R-12 was phased out due to its ozone depleting characteristics. If you have a vehicle made between 1992-1995, you may have either R-12 or R-134. If your vehicle does have R-12, it has to be converted to use R-134 which is a job best left to an A/C mechanic to handle. In my case, my 1996 truck took R-134 and I needed two cans for the size of the system.
Pro Tip
For a few bucks more, get a kit with the UV dye as it will greatly assist in tracking down minor leaks.
Step 1

Find the Low Side Port
Next, find the low side port of your A/C system. This will be the barb on the larger tube between the compressor (mounted to the engine and with a belt) and the evaporator (a large aluminum can). If in doubt, consult your service manual or local parts store.
Step 2

Attach Can of Refrigerant
Screw the dispenser hose and gauge onto the can of refrigerant. Attach to the low side port by pulling back the outer slip ring, pushing it on, and releasing the ring. Next, start the engine, turn the A/C system on max, and check the gauge reading. The compressor clutch should be engaged and the front of the compressor spinning. If the pressure is lower than 20 psi and the compressor is not engaged, then dispense refrigerant until the clutch engages. Be sure to shake the can first and every 3-4 seconds later.
Step 3
Continue Dispensing Refrigerant
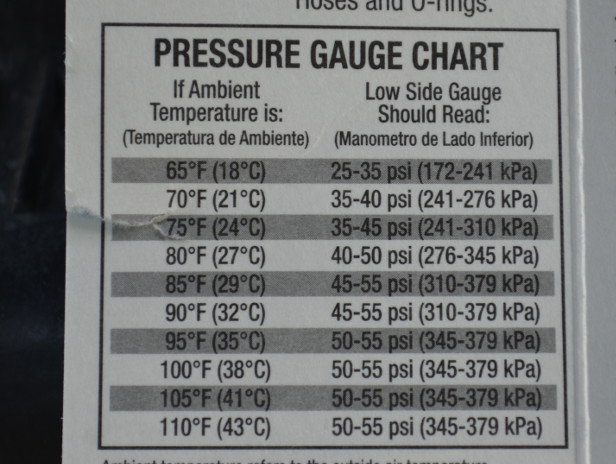
Consult the pressure chart in the refrigerant instructions for the proper system pressure. Continue dispensing refrigerant and rechecking the pressure until the desired level is reached. In my case, with an ambient temperature of 85 degrees, the instructions called for 45-55 psi. Be sure not to over pressurize the system. If you feel like the can is empty, flip it over to dispense the remaining oil before removing.
Step 4

Check for Minor Leaks
If you bought a UV kit, check the system for minor leaks so repairs can be made if necessary. Use the UV pen and examine all valves and junction points in the system. In my case, I found a small spot where the front A/C feeds refrigerant to the rear A/C under the car.