很久没上菜了~~~经济不景气,单位人事也动荡不安。保饭碗要紧,只好cut上网时间啦:)
儿子回家过节,他喜欢吃老妈烤的火鸡,买了两只十磅左右的腌上。本想今年就安安静静在家过节吧,又有朋友来约去她家Party。朋友说到俺的博客看过几次,还是下不了决心自己烤火鸡。于是俺就承包了这个任务~~~赫,对于偶来说,这就是偷懒啦:)
说下不了决心自己动手的朋友似乎还有好几个~~~想想大概是我这个中西结合的方子中,给火鸡‘洗热水浴’的这步比较唬人。今天再拍几张过程图,希望能给想试一把的朋友一点信心。 没太多时间码字,详细的文字说明请看俺去年整理出来的这个贴子,今天只是加些补充:
【整理旧贴】用烤鸭子的方法烤火鸡(点击阅读)
/>
1。腌制:十磅左右的火鸡,大约用了一杯盐,半杯花椒。腌了三天~~~这回花椒盐是炒了一下的,所以一揭开盖子椒盐和酒的香味扑鼻而来:  {
{
function anonymous(){function anonymous(){function anonymous(){function anonymous(){if(this.width>450) this.width=450}}}}
}" />
(再汇报一下,俺家去年又添了一个上下门的冰箱,两个火鸡一起腌的,另一个明天烤,给儿子带回去跟室友分享:)
2。热水浴:火鸡体积比较庞大,有大锅煮水当然比较省事。但大锅子连水带鸡的就比较重,容易出事故~~~这恐怕也是朋友们望而止步的主要原因吧? 其实只要选一个小一点的火鸡,用这样浅浅的锅子也行: 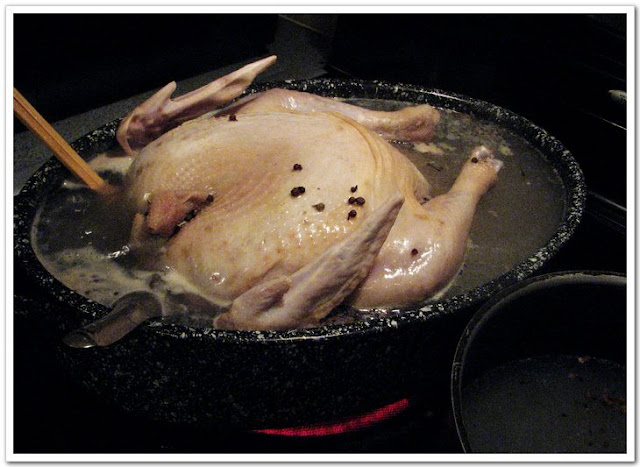 {
{
function anonymous(){function anonymous(){function anonymous(){function anonymous(){if(this.width>450) this.width=450}}}}
}" />
可以用两个锅,一起煮开半锅水。同时加入秘方中那三样调料~~~千万别忘了这个噢!
厨房老手们一定可以看出来,前面这两步不可省。因为这样做的目的主要是去腥和改善肉质并且是成品皮色金黄的保证:)
把火鸡肚皮朝上轻轻放入水里(注意安全,必要时请LG帮忙:),然后用大勺把另一只锅里的滚水浇淋没有被淹没的部分。等盛鸡的锅子水满了,再舀些回来~~~就这样重复。偶尔用木铲动一下火鸡,免得粘底掉皮。
虽然听起来麻烦,好处是比较从容,危险性也大大降低。而且浇淋的时间也就五六分钟~~~看鸡皮变色就差不多啦。然后关火,把热水舀回空锅,再把鸡连锅端到水池这么一斜,把剩余的水倒掉,再等它凉一凉就好搬动啦: 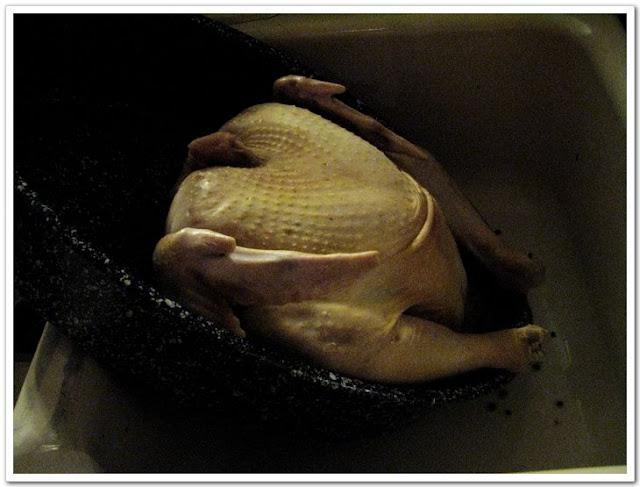 {
{
function anonymous(){function anonymous(){function anonymous(){function anonymous(){if(this.width>450) this.width=450}}}}
}" />
3。晾干:找个大盘子,倒架上电饭锅的蒸屉: 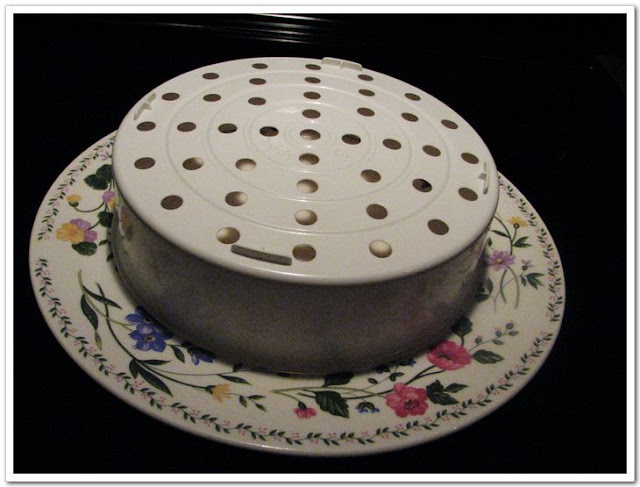 {
{
function anonymous(){function anonymous(){function anonymous(){function anonymous(){if(this.width>450) this.width=450}}}}
}" />
上晒台: 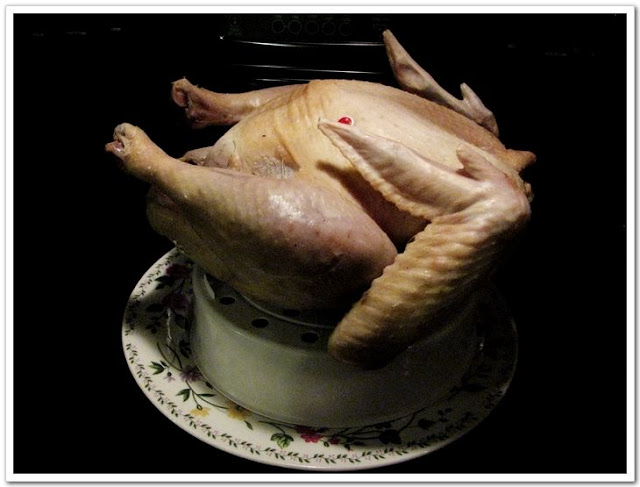 {
{
function anonymous(){function anonymous(){function anonymous(){function anonymous(){if(this.width>450) this.width=450}}}}
}" />
以前都是早起烧水烫鸡,晾半天就够了。昨晚从一个朋友的生日Party回来后,因想今天睡懒觉,就提前做了这一步:)
 {
{function anonymous(){function anonymous(){function anonymous(){function anonymous(){if(this.width>450) this.width=450}}}}
}" />
4:开烤:先包好易焦的鸡翅:
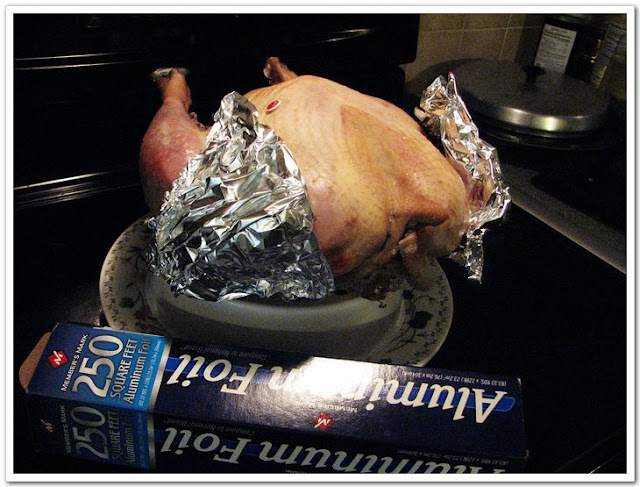 {
{function anonymous(){function anonymous(){function anonymous(){function anonymous(){if(this.width>450) this.width=450}}}}
}" />
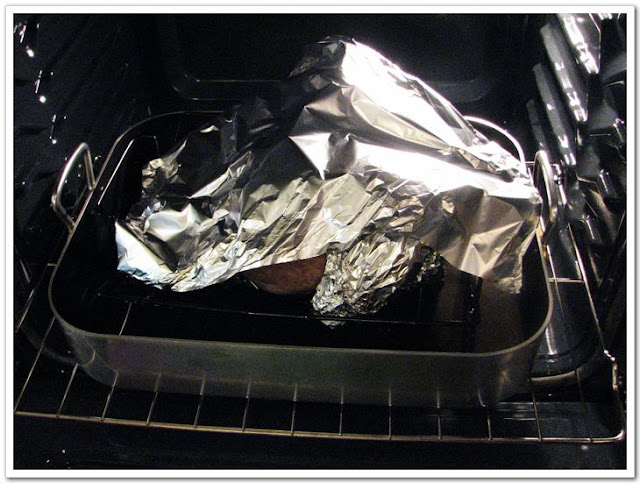
别忘了烤盘里加水的秘诀哦~~~就这样松松地盖上锡箔纸,400度先烤三小时(不用预热,等待的时间俺就先处理前面拍的照片和码字啦:)
 {
{function anonymous(){function anonymous(){function anonymous(){function anonymous(){if(this.width>450) this.width=450}}}}
}" />
然后揭开锡纸,可把盘里的油水浇几勺在皮上,再烤一到两小时(参考包装袋上的时间把握吧~~~更大的就增加盖着纸烤的时间):
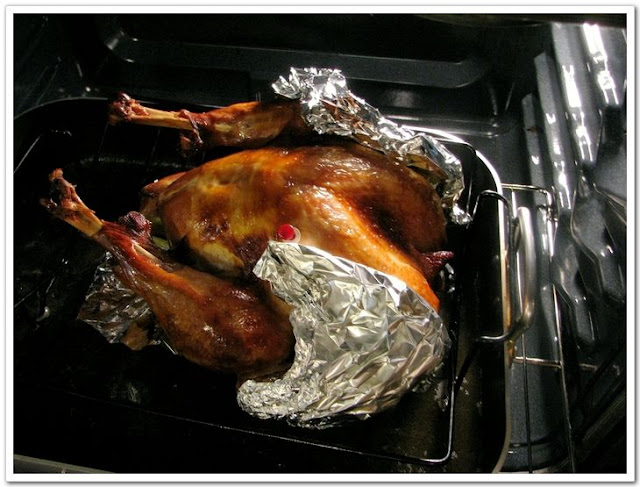 {
{function anonymous(){function anonymous(){function anonymous(){function anonymous(){if(this.width>450) this.width=450}}}}
}" />
这只鸡比较小,后面我只烤了40分钟就熄火了。
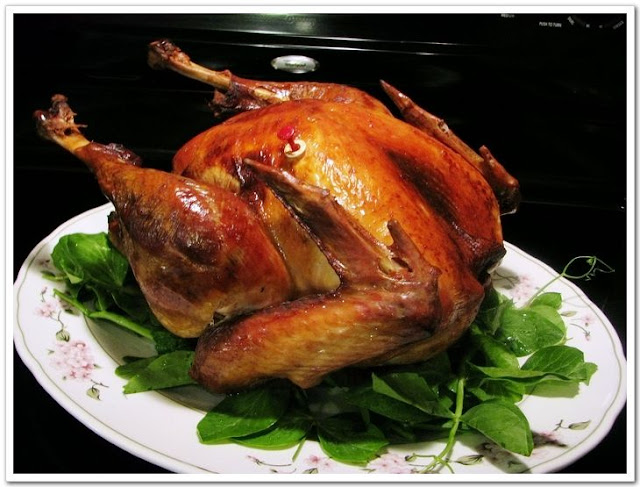
5:出炉啦:
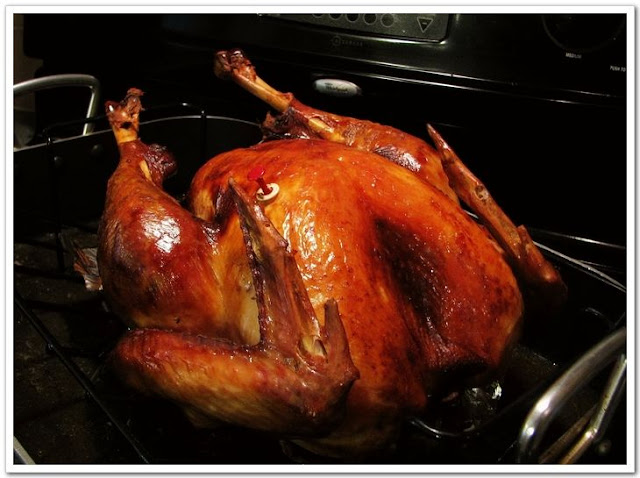 {
{function anonymous(){function anonymous(){function anonymous(){function anonymous(){if(this.width>450) this.width=450}}}}
}" />
再来两张:
 {
{function anonymous(){function anonymous(){function anonymous(){function anonymous(){if(this.width>450) this.width=450}}}}
}" />
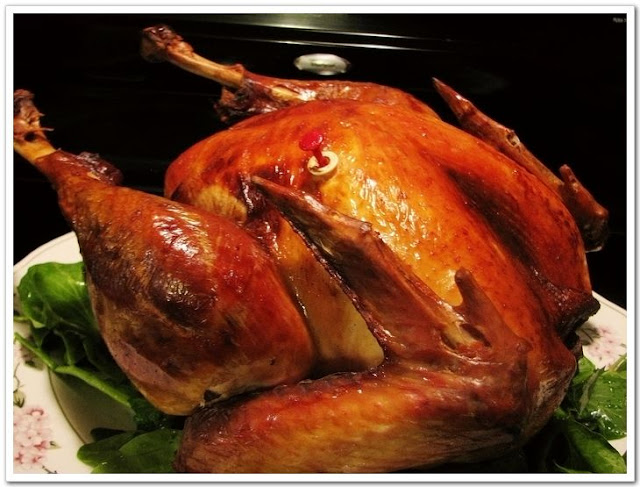 {
{function anonymous(){function anonymous(){function anonymous(){function anonymous(){if(this.width>450) this.width=450}}}}
}" />
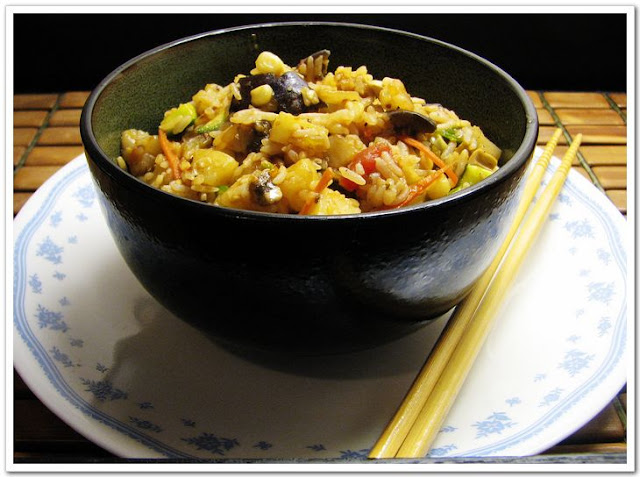
今天中午就简单吃点炒饭:
 {
{function anonymous(){function anonymous(){function anonymous(){function anonymous(){if(this.width>450) this.width=450}}}}
}" />
内容很丰富哦~~~有鲜虾仁,鸡丁,土豆丁,茄丁,黄瓜丁,蘑菇丁,青椒丁;加上冰冻玉米,胡萝卜;再用Salsa酱调味。儿子最喜欢这种炒饭啦,俺以前有过专贴介绍,新来的朋友若有兴趣可点击查看(刚修好了照片连接):
【懒人菜谱7】简单好吃的炒饭和日本酱汤(点击阅读)
/>
还有一盘简单好吃的凉面,相信很多朋友一看就会做:  {
{
function anonymous(){function anonymous(){function anonymous(){function anonymous(){if(this.width>450) this.width=450}}}}
}" />
月初为了感谢在偶回国期间帮我搬办公室杂物的同事做了一盆带去节日Party,结果有人找来说要给俺钱,让给再做一盆;后来LG也带去单位参加节日聚会,也是回来要菜谱。其实就是意大利面条做的,超级简单!如果大家喜欢,我再找时间拍些过程图,给俺中断已久的‘懒人菜谱’再加一篇:)
Party去啦~~~也祝你过一个温馨快乐的感恩节!!!
(Reflections Of Love)
参考:
Roasting times are for a preheated 325 degrees F. oven.
| Approximate Roasting Times for Stuffed Turkey | |
| 6 to 8 pounds | 3 to 3-1/2 hours |
| 8 to 12 pounds | 3-1/2 to 4-1/2 hours |
| 12 to 16 pounds | 4-1/2 to 5-1/2 hours |
| 16 to 20 pounds | 5-1/2 to 6 hours |
| 20 to 24 pounds | 6 to 6-1/2 hours |
| Approximate Roasting Times for Unstuffed Turkey | |
| 6 to 8 pounds | 2-1/2 to 3 hours |
| 8 to 12 pounds | 3 to 4 hours |
| 12 to 16 pounds | 4 to 5 hours |
| 16 to 20 pounds | 5 to 5-1/2 hours |
| 20 to 24 pounds | 5-1/2 to 6 hours |